Bow-tie has to be an absolute perfection because it represents your discipline, style statement and precision. It is the head of your suited look and has to be as neat as your suit.
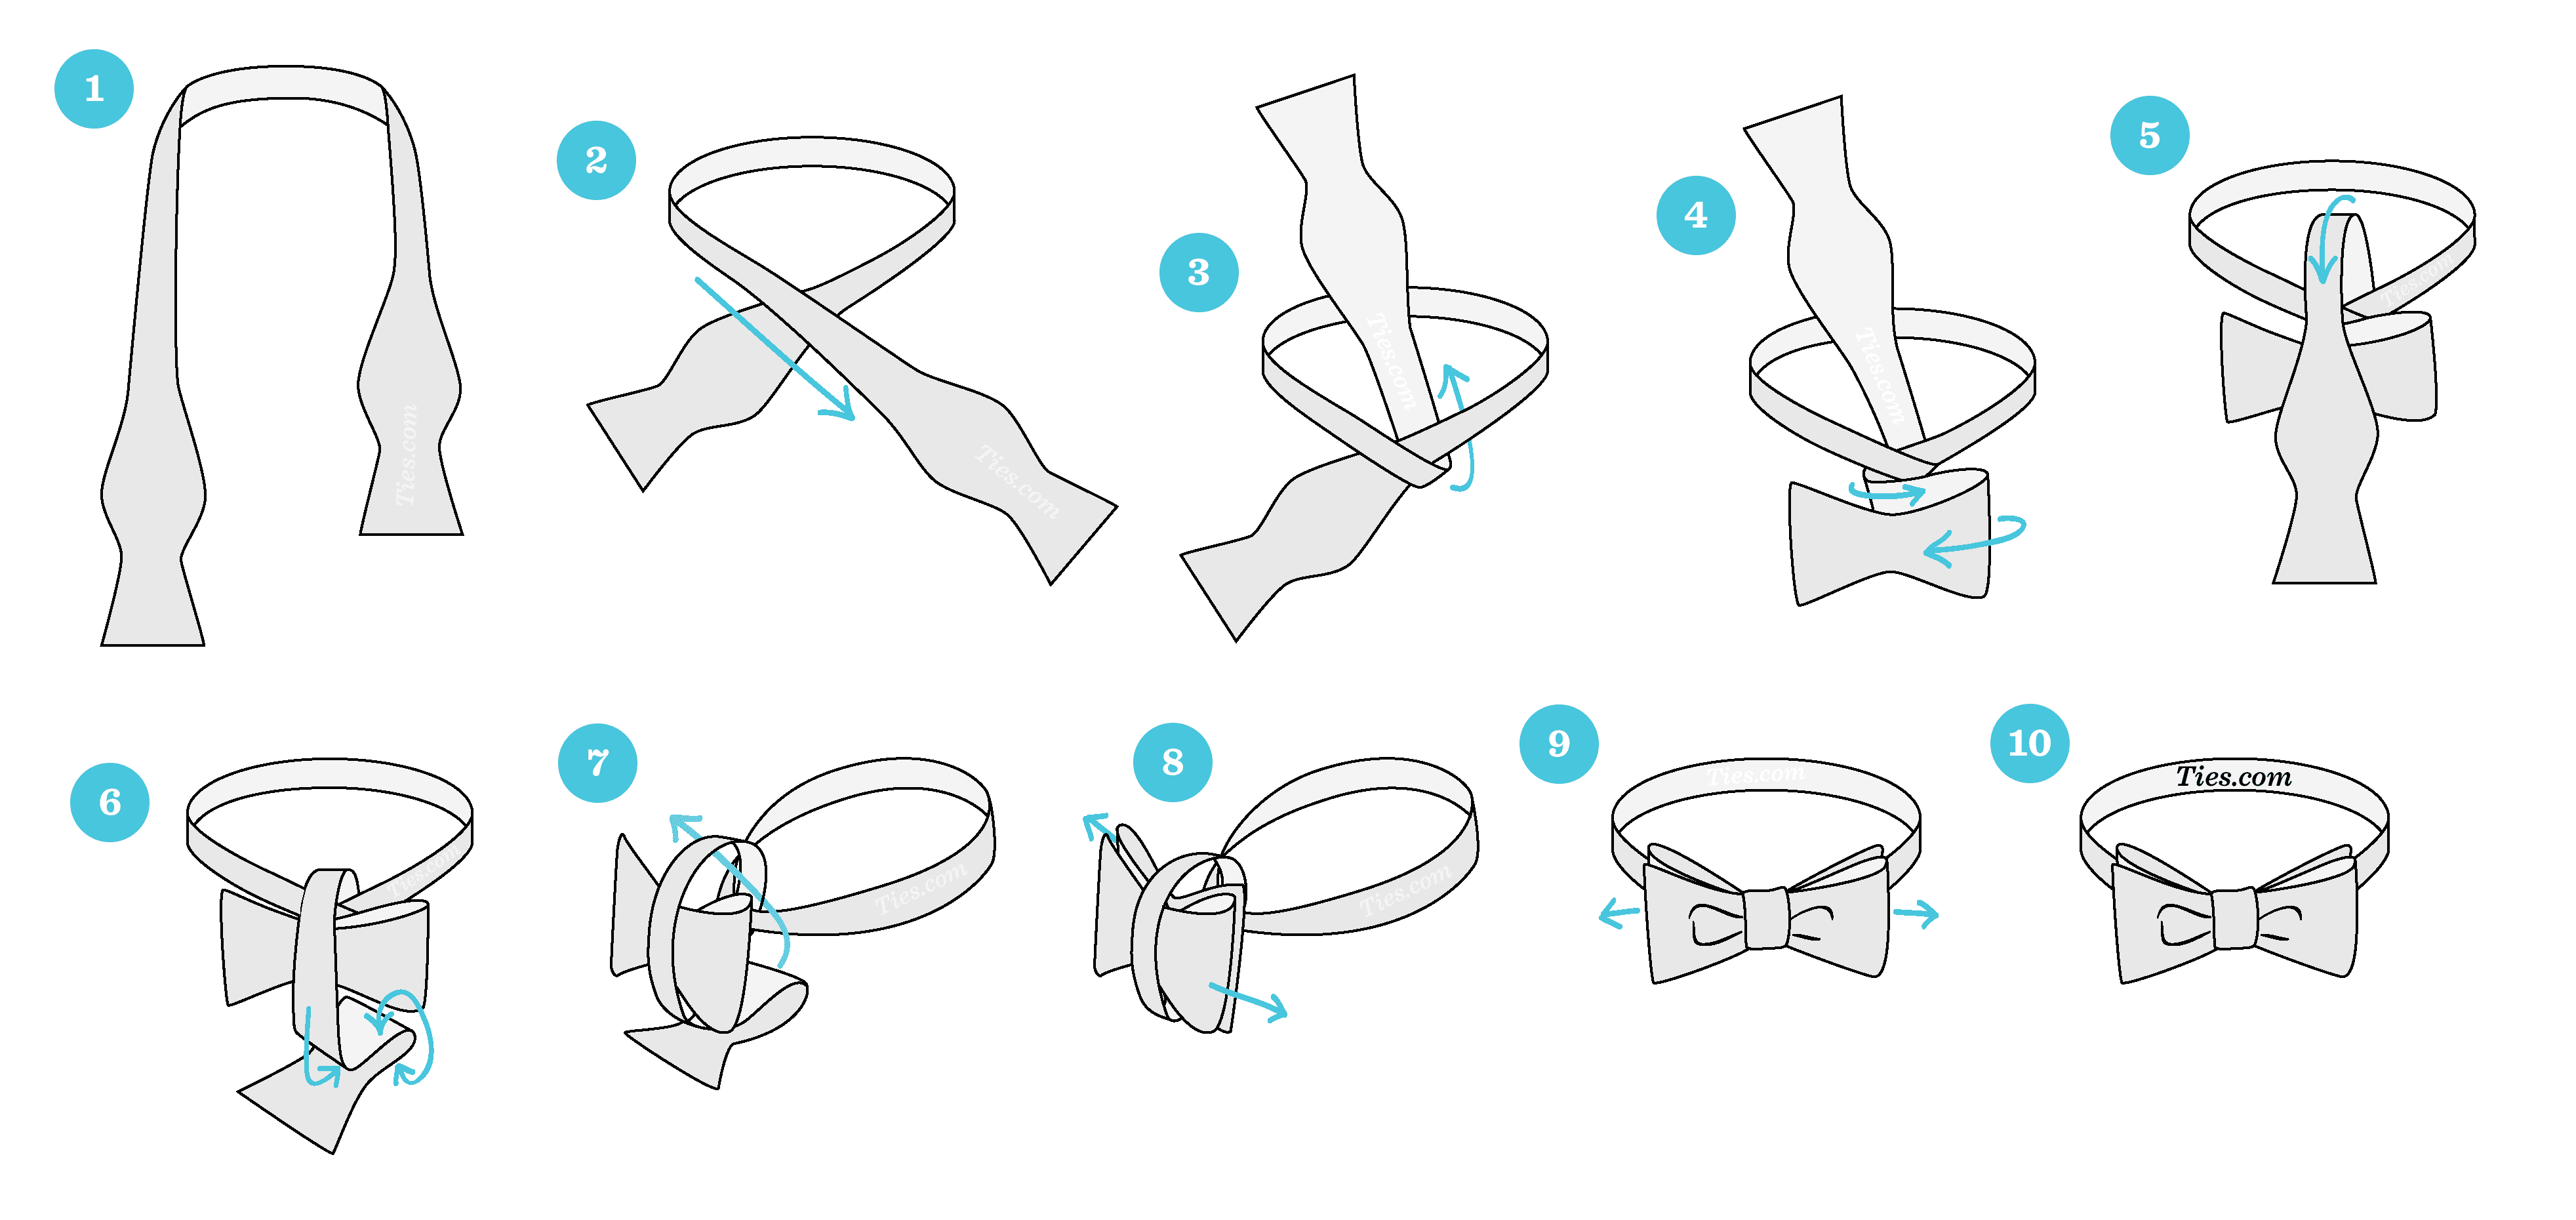
This is essentially a 10-step easy routine and you must follow each step in the perfect manner as per instructions with the help of the image:
1) You need to have your bow tie ready. It should be washed clean and well-ironed. If this is your first go with the bow-tie, it is already good to go. But make sure there are no bends and folds or your final look will not be as good. Lift your collar and place it around your neck. Let the right side hang longer than the left. You can also keep the left longer, it is up to you but in that case switch the following instructions accordingly.
2) Now, place the extended right side over the left.
3) Step 3 is to then take that extended right side inside forming a knot and point it upwards.
4) Now take the bottom bow region of the left side and fold it to create the bow.
5) Bring down the extended right side from top in front of the folded bow in step 4
6) Now take the extended right side and fold the bottom bow region as per the shape to create a bow.
7) The next step is to tuck this in, right behind your already created front bow.
8) Now adjust the front bow to match the one in the back.
9) Finally pull the bow at the back to match the front and also to fix the knot correctly.
And the 10th step is to look absolutely charming with your perfectly precise bow-tie!
Spread the love!
Found the article helpful? Share it with your friends,
and help them discover TheUnstitchd.com


